
If, like me, you hate chipped nails and frown at the thought of bare nails, then gel nail polish is a dream. This of course doesn’t mean to rely on gels all the time as it’s good to change it up. The Red Carpet Manicure Professional LED Kit means you can do it yourself in the comfort of your own home in front of the telly.
This costs £89.95 which sounds fairly expensive but when you add up the cost of getting a gel manicure at a salon this now sounds cheap. You get so many manis out of this and all you need to do is top up on the polishes which aren’t too much.

Professional LED Kit contains:
- Professional LED Light (with timer function)
- PURIFY Pre & Post Application Cleanser
- PREP Max Adhesion Sanitizer
- STRUCTURE Base Coat Gel
- BRILLIANCE Seal & Shine Top Coat Gel
- ERASE Gel Nail Polish Remover
- REVITALIZE Nourishing Cuticle Oil
- LED Gel Polish in Red Carpet Reddy
STEP 1:
Brush PREP Max Adhesion Sanitizer on the nails to clean them. This makes your nails feel really dry but it’s essential to ensure the gel attaches to the nail.

STEP 2:
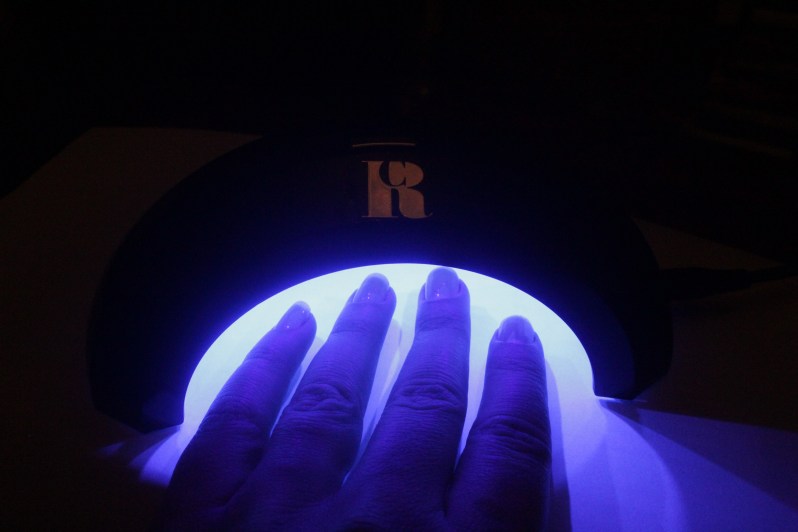
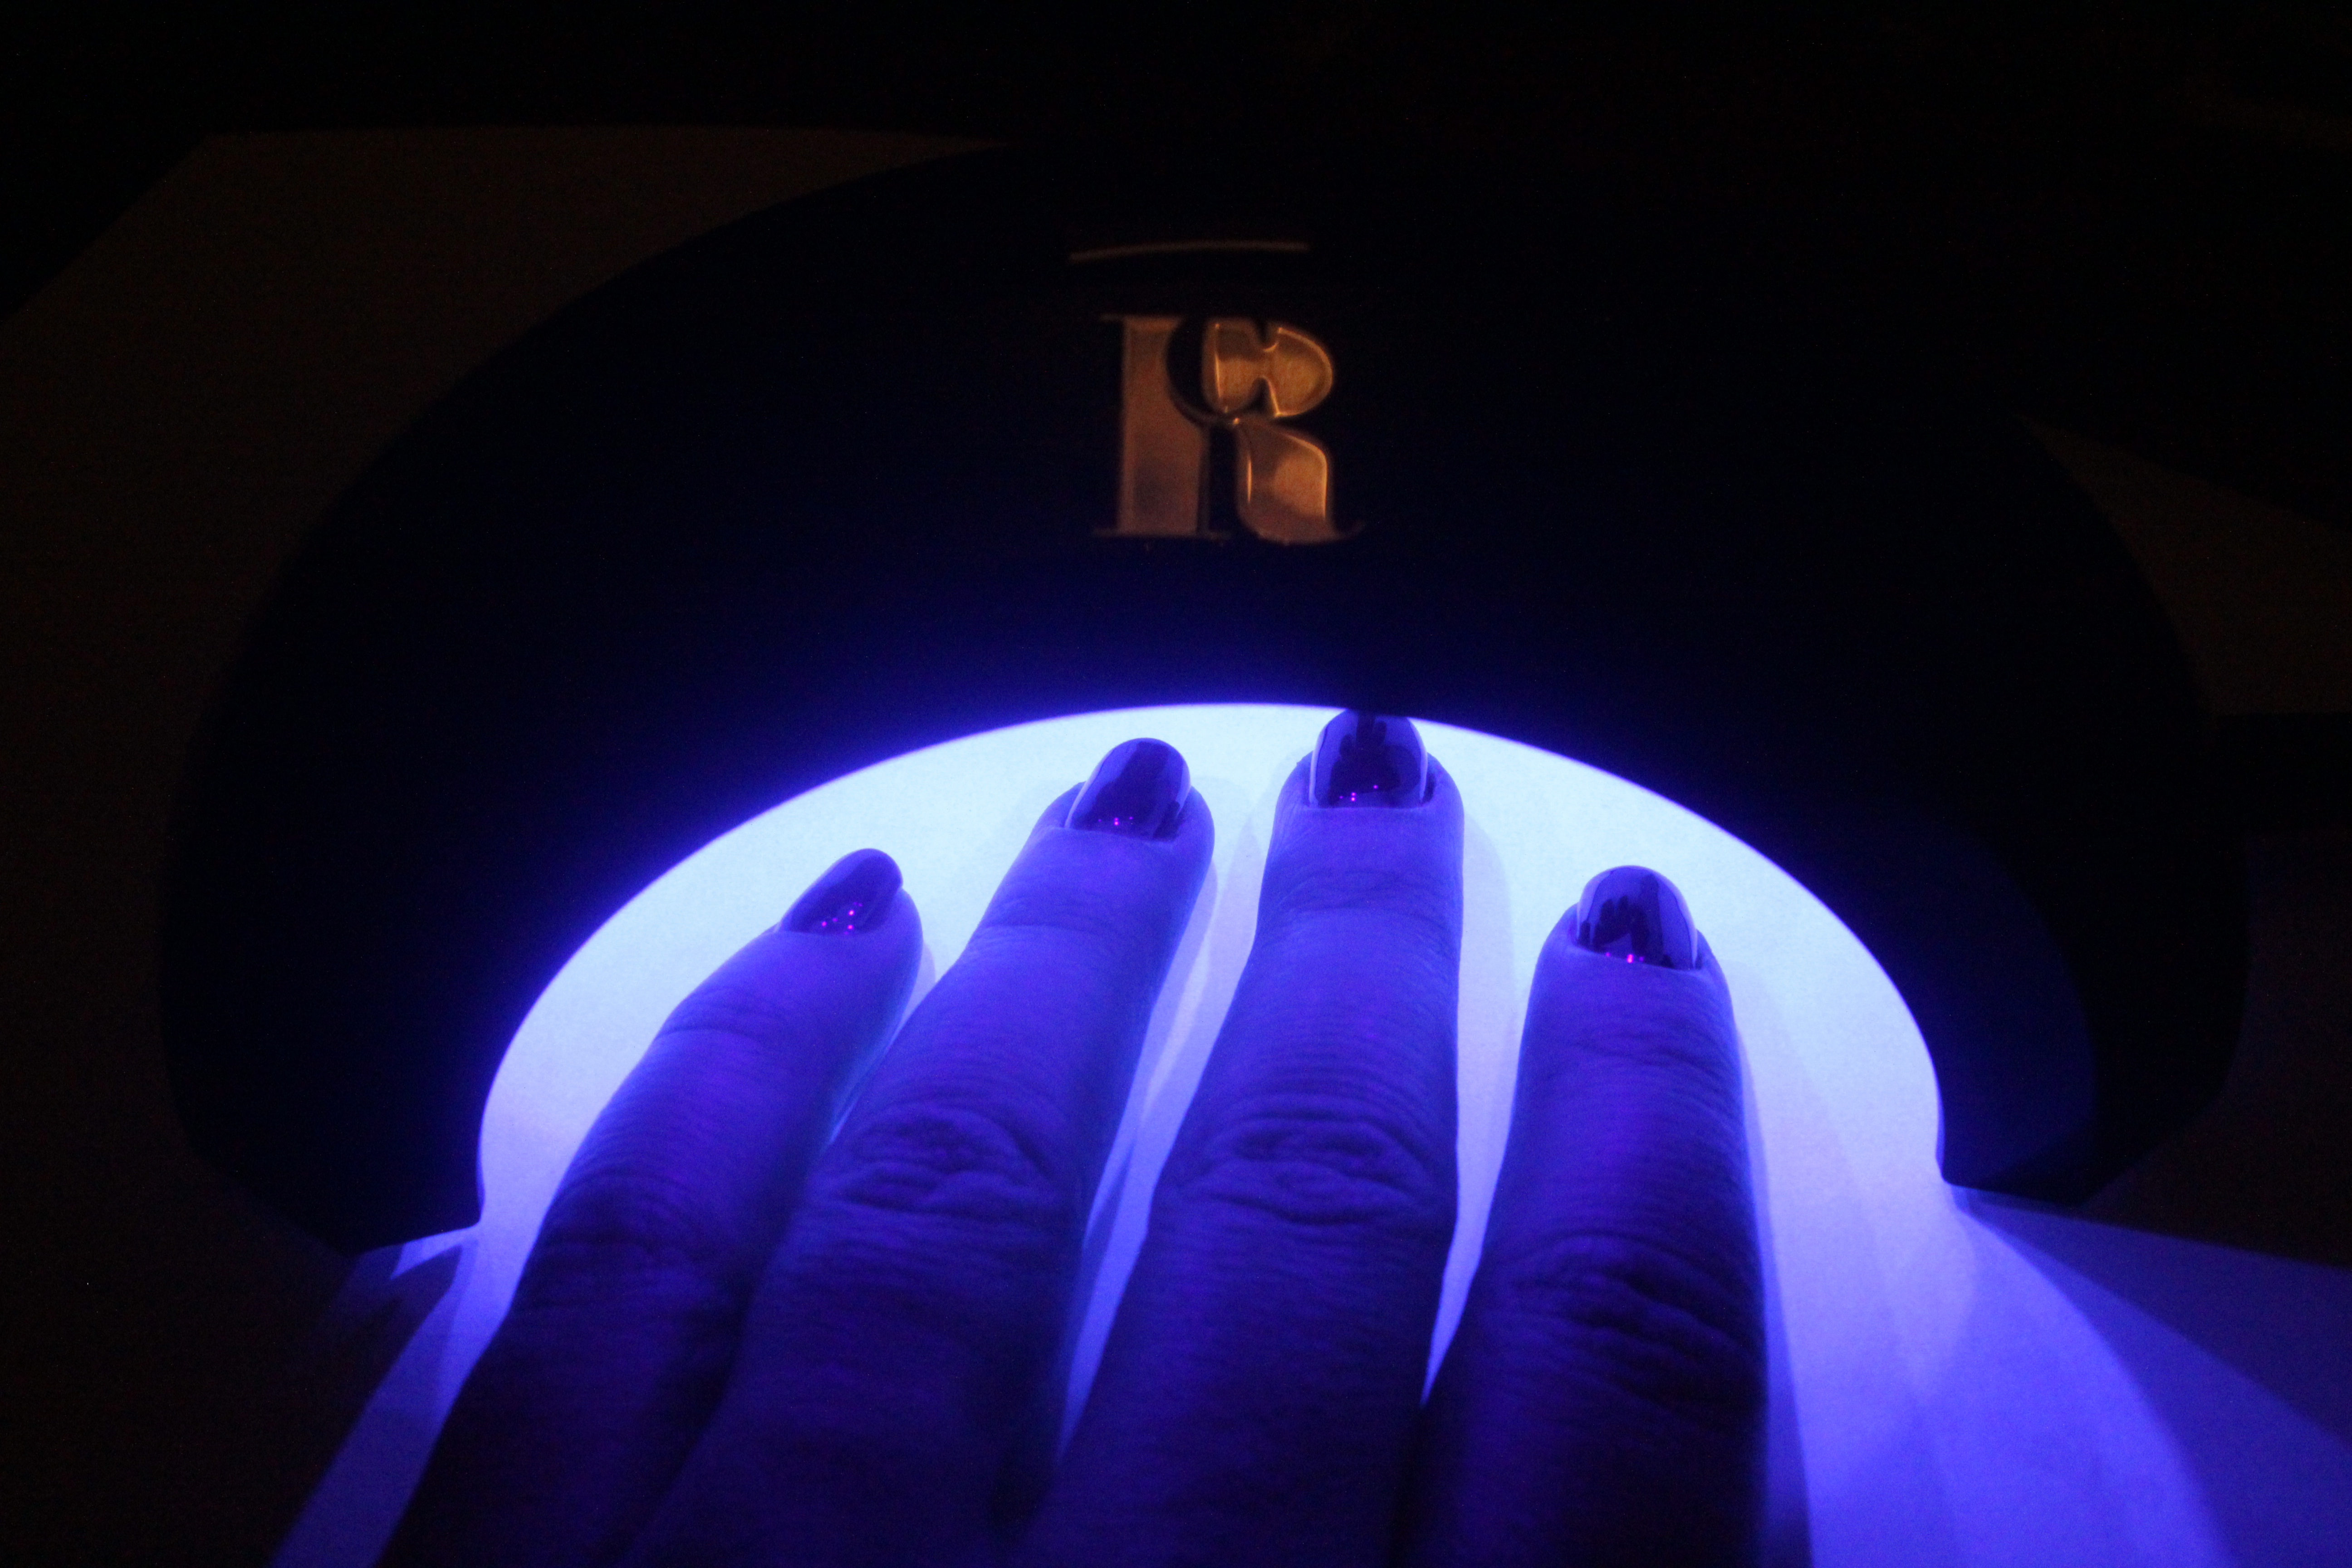
Apply a thin coat of STRUCTURE Base Coat Gel to your four fingers and cure under the Professional LED Light for 30 seconds. Repeat with your other hand and then your thumbs together.
TIP:
You need to ensure, with each layer of gel (base coat, colour gel and top coat), to go over the edge of your nail. Gel has a tendency to shrink over the days after you have applied it so if you don’t ‘seal’ the nail, it will begin to peel off from the edge. I feel this is the hardest part of the whole process, everything else is pretty easy, but trying to ‘seal’ the nail while not getting the gel on your skin is a challenge. If you do get any on your skin simply dip a cotton bud into the ERASE Gel Nail Polish Remover and dab the area before curing it under the light.

STEP 3:
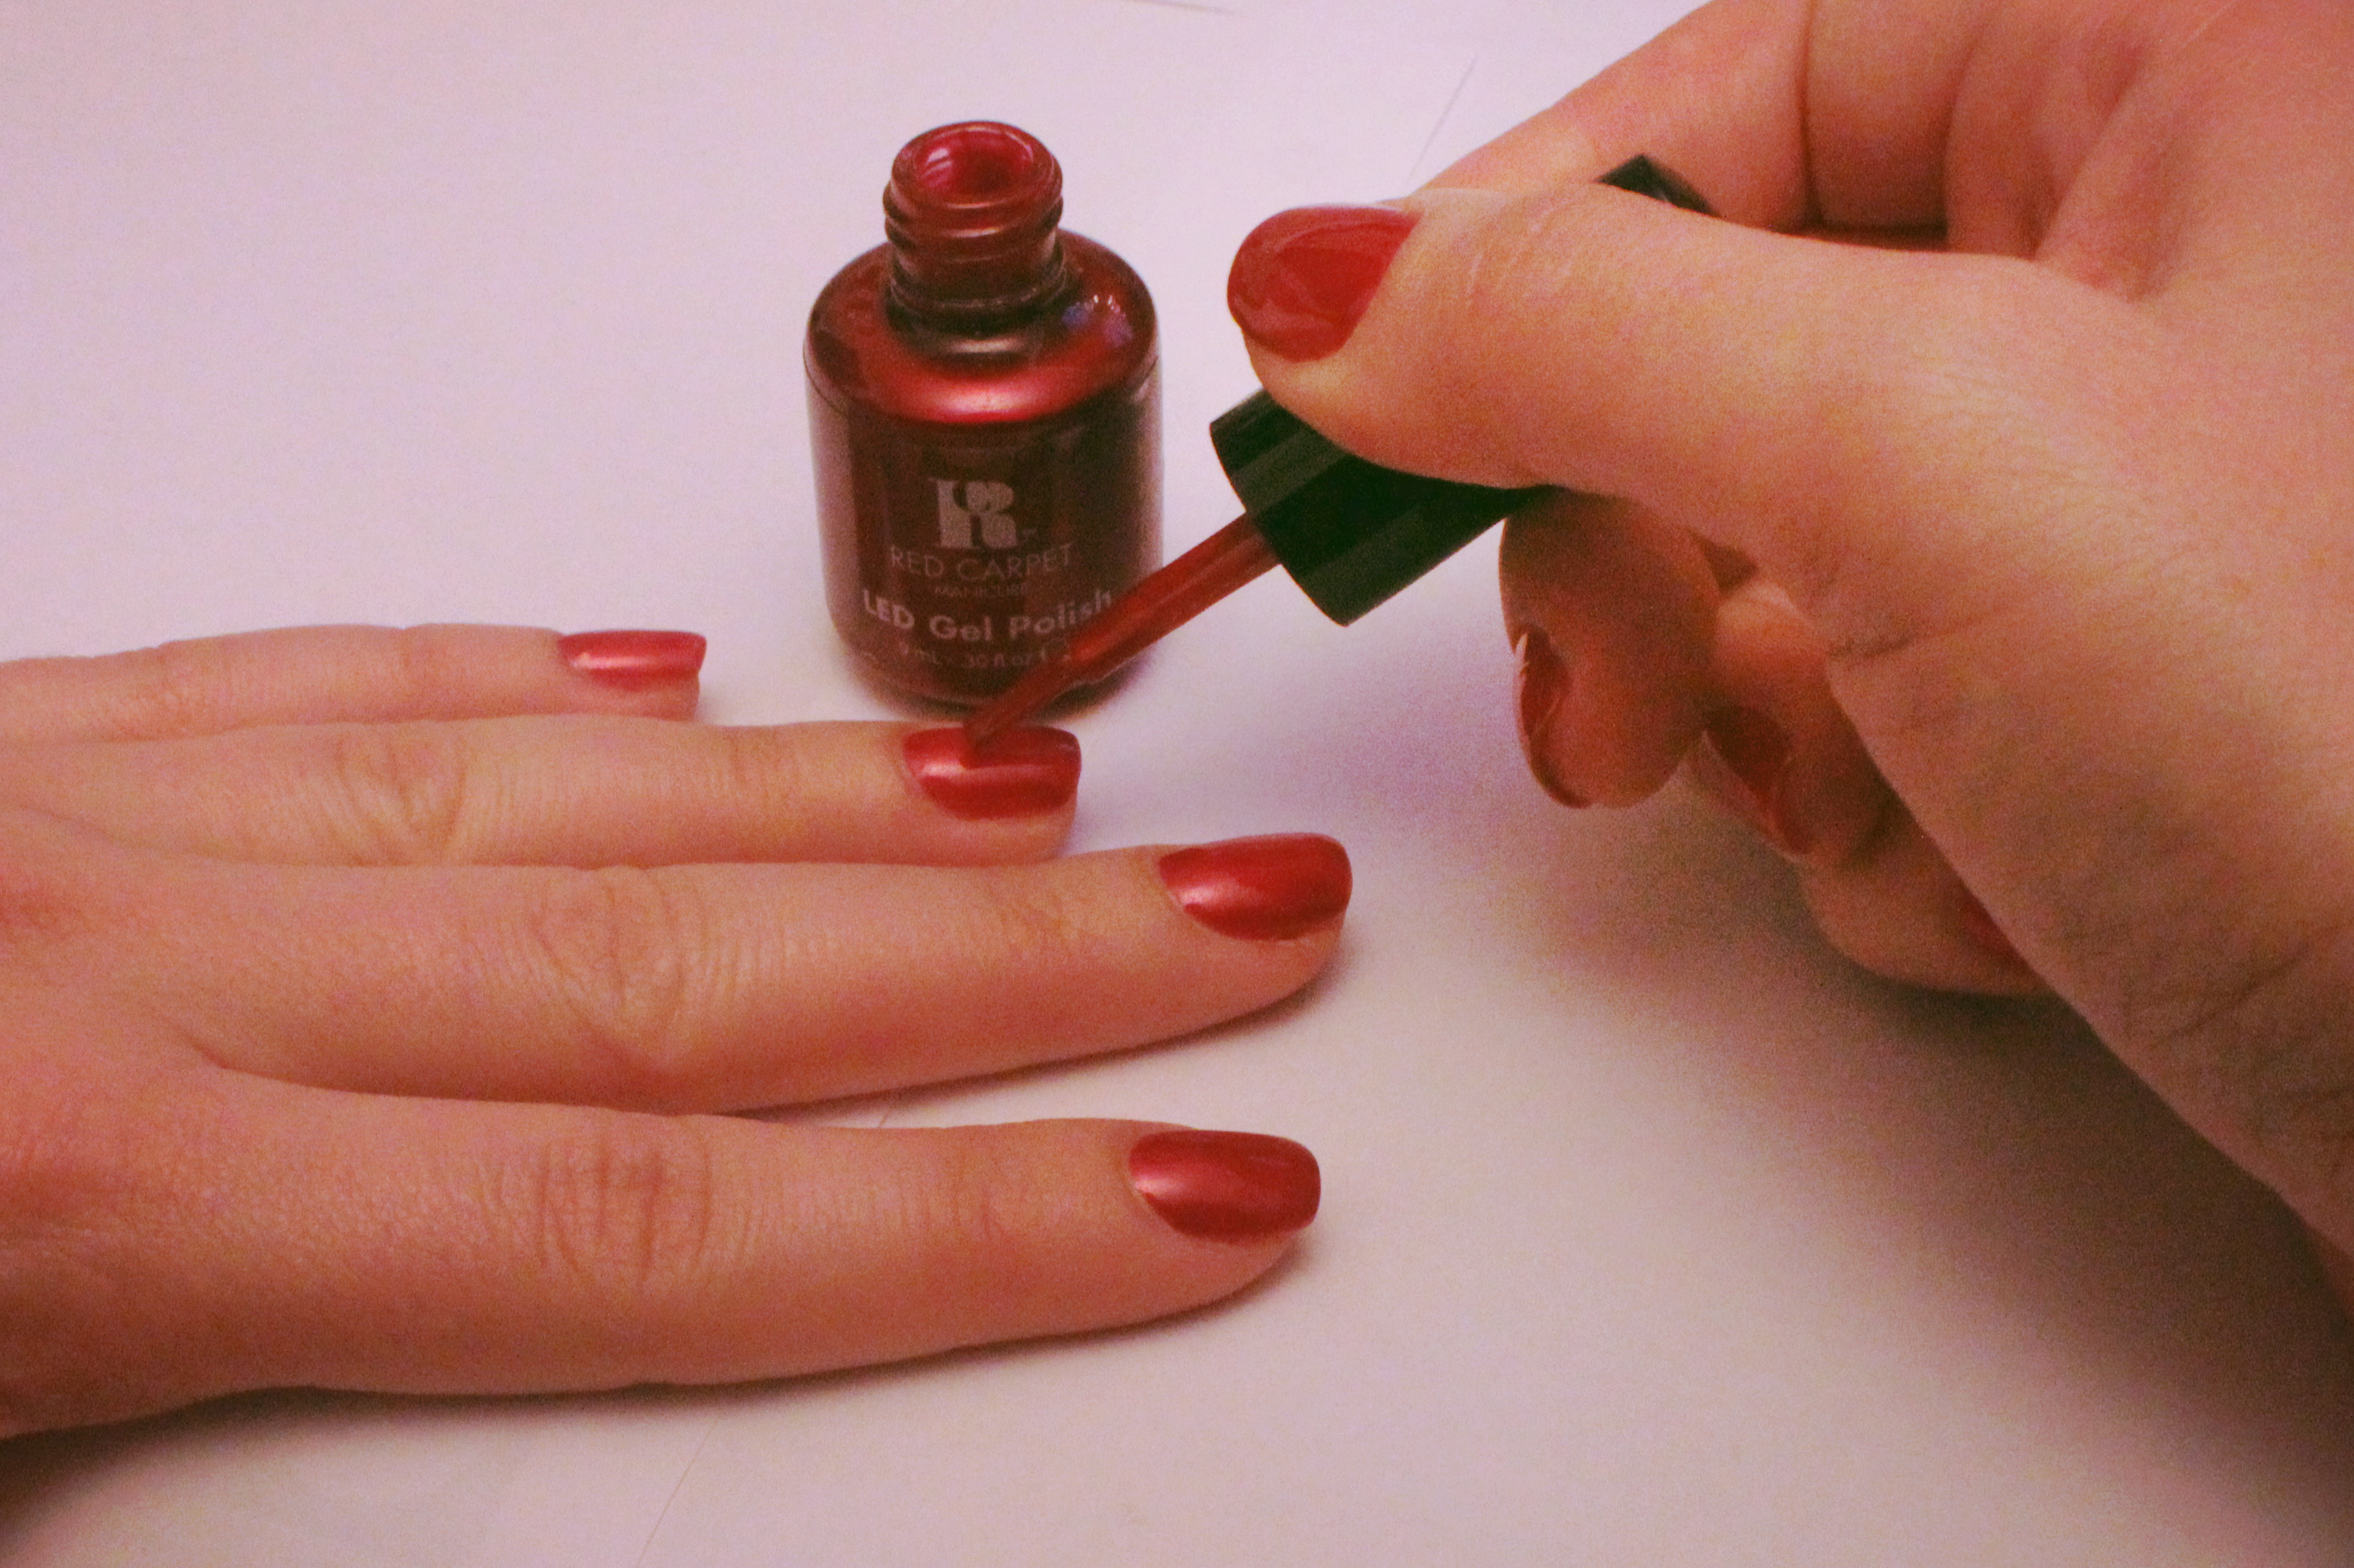
Apply a thin coat of the colour of your choice (here I used Glitz & Glamorous) on your four fingers again aim to seal the edge of the nail and cure again under the LED light for 45 seconds, repeat with the other hand and then do the thumbs together. Repeat the process for a second coat.
STEP 4:
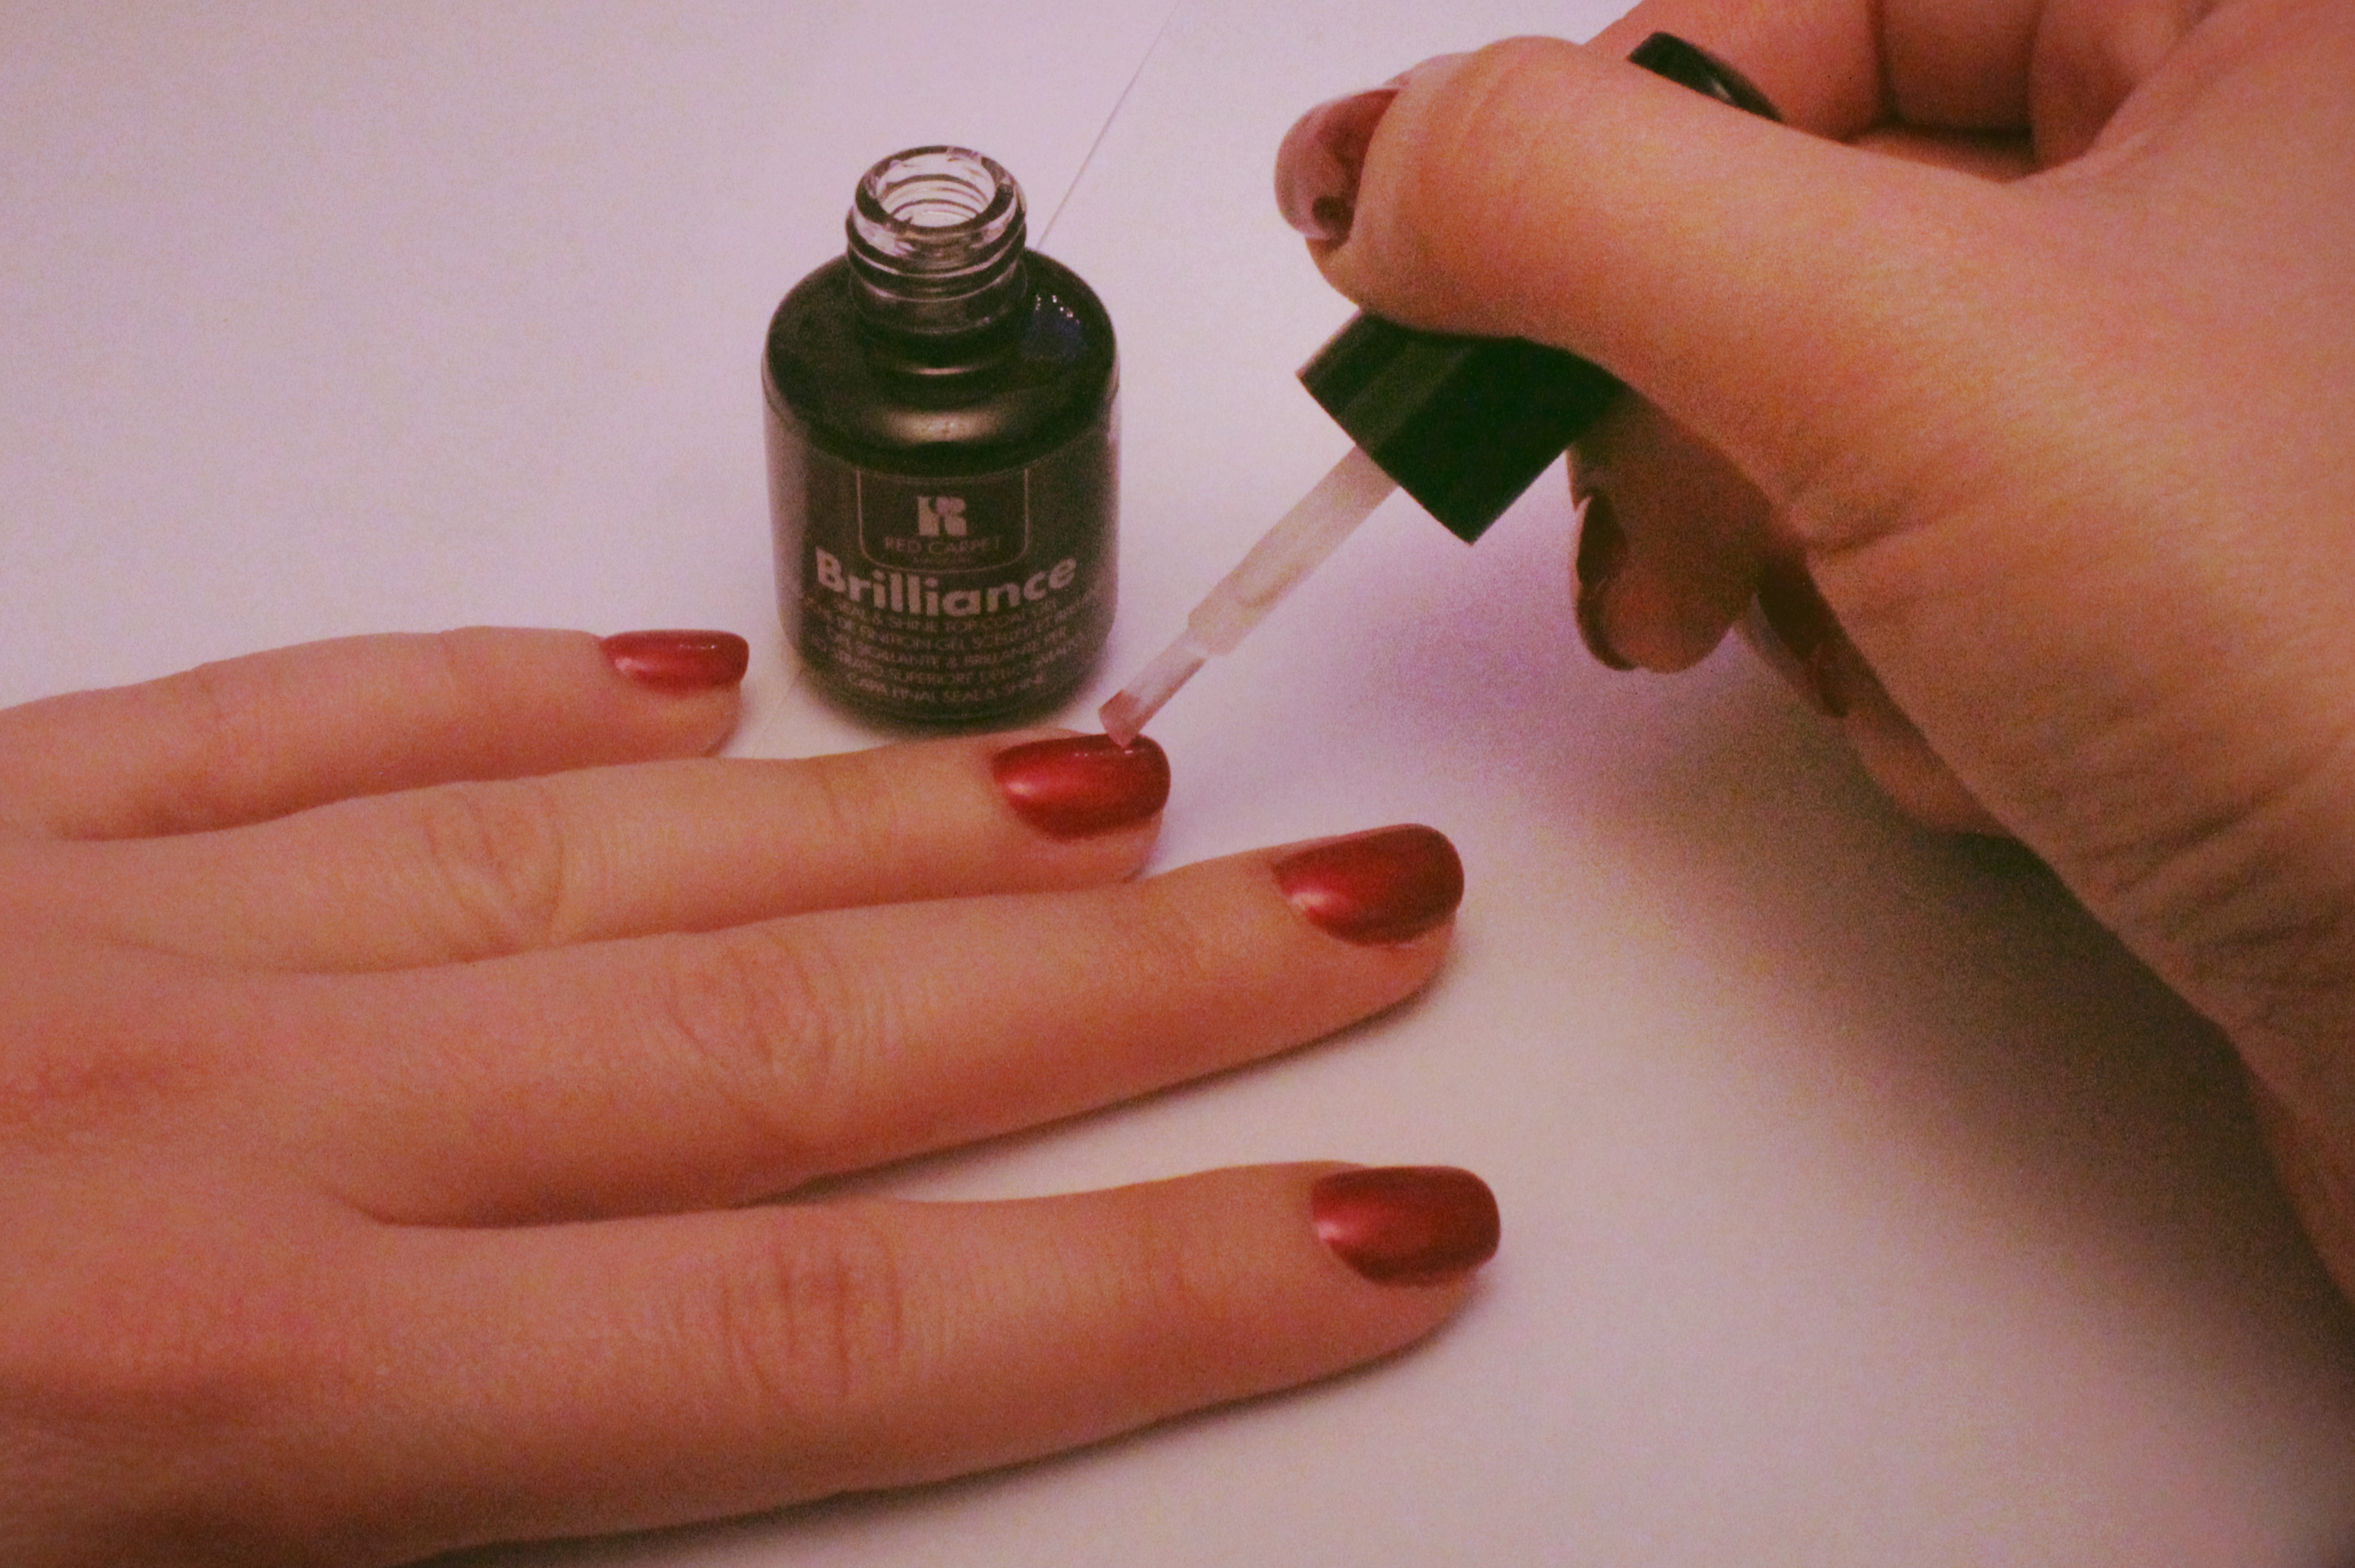
Apply a thin coat of BRILLIANCE Seal and Shine Top Coat Gel, seal the nail and cure under the LED light for 45 seconds.
STEP 5:
Dab a lint free pad (I didn’t have any so just used a cotton wool pad) with PURIFY Pre & Post Application Cleanser and wipe each nail to remove any tacky residue.
For the finale wipe a drop of REVITALIZE Nourishing Cuticle Oil on to each nail at the cuticle to moisturise and VOILA….
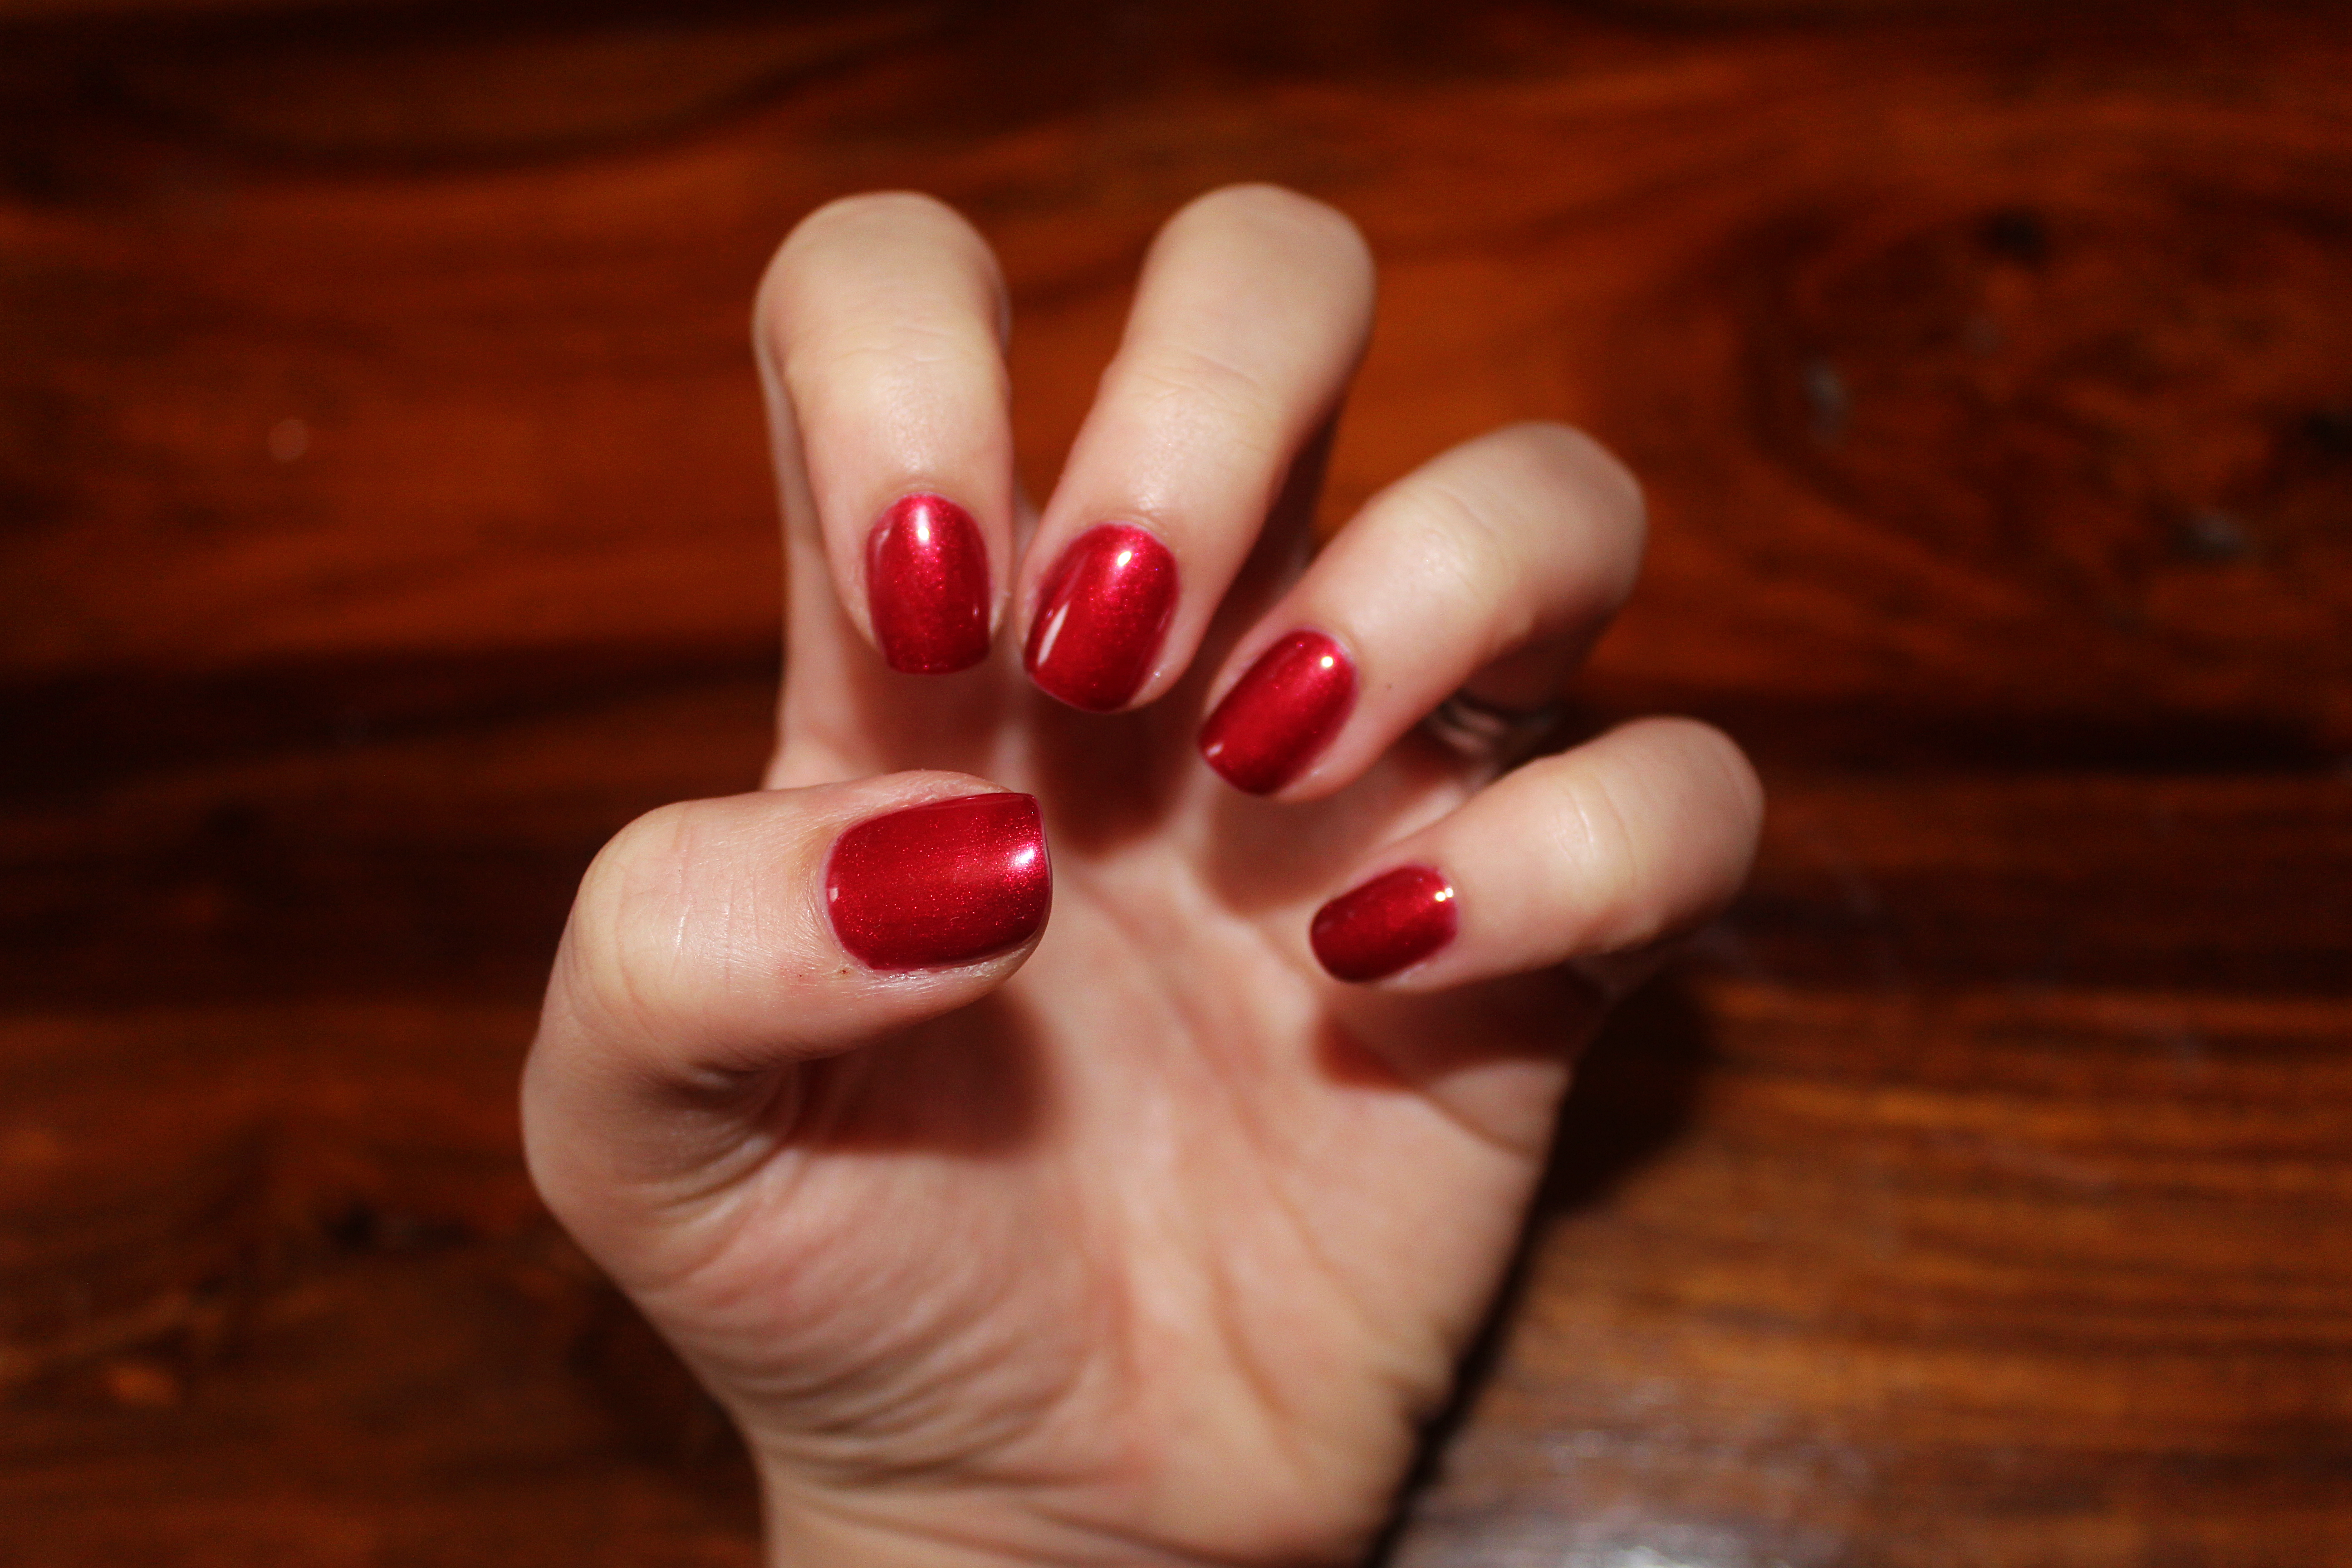
…Professional looking gel manicure, that should last two weeks, done myself whilst watching Made In Chelsea.
There is a brilliant feature on the Red Carpet Manicure website that I love – when you head to the ‘Colour Range’ section and select a colour, a box at the bottom appears which links to Pinterest. It’s always a slight gamble when buying nail polish as there are times when it just doesn’t come out the colour you had expected. At least this way you get a better idea of the colour as you get to see lots of images of the polish on peoples nails. Genius.

After exploring a few of the blog articles on your web
page, I honestly appreciate your way of writing a blog.
I added it to my bookmark webpage list and will be checking back in the near future.
Please check out my web site as well and tell me what you
think.
After looking into a few of the blog articles on your site, I truly appreciate
your technique of writing a blog. I book-marked it to my bookmark site list and will be checking back in the
near future. Please visit my website as well and let me know how you feel.